This is the first article in a 6 part series on Saving Water. Living in Sydney, Australia I’m acutely aware of the value of this precious resource.
To start with, here’s a look at something which underlies all efforts to save (and re-use) water – measuring your current water usage.
Can’t I just take a look at my bills?
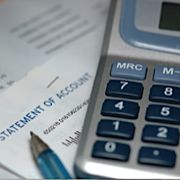 Your water bills will certainly give you an approximation of the water you currently use – inside the house at least. They won’t take into account the amount of rainfall you receive (which often helps out by watering the garden occasionally, topping up the pool a little and filling up things like small ponds, water features and birdbaths).
Similarly, the bills won’t help you determine how much of your water usage is taken up by different parts of the house. When a slightly higher bill arrives, was it the bath or a leaking tap at fault?
NB : I realise that not everyone receives a separate bill for water usage. It may be part of a regular payment which is made to your local council, or other government body. If that’s the case, the following methods will definitely come in handy. After all, it isn’t free.
Measuring rainfall
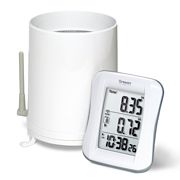
This is where I slowly raise my hand and state ‘My name is Scott, and I’m a Weather Geek‘. If you’re not similarly afflicted, don’t worry – measuring rainfall is a painless and simple process. What’s more, it doesn’t involve going outdoors when it’s raining.
The easiest way to do this is to grab yourself something like the Oregon Scientific rain gauge pictured (this is actually the one I use). Essentially it’s a small bucket – which gets left out in the rain – and a small display which sits in comparative comfort indoors. The bucket communicates with the indoor display (via a wireless connection), and tells you exactly how much rain has just fallen. It also tracks the rainfall over the previous month.
All you need to do is write down the mm/inches that it says. I’ll show you how to use that information in an upcoming piece.
Checking for leaks
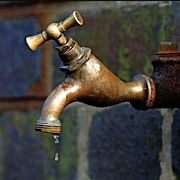 Before you begin checking the various appliances around your house, it’s a good idea to quickly check for leaks. No only will this alert you to a potential problem (and allow you to easily save some money), it will take ‘leaking taps‘ out of the equation.
Doing this is extremely simple :
- Turn of everything which is using water, and check the meter
- Wait a couple of hours
- Check the meter again
If there’s any difference in the meter readings, chances are you have a leak somewhere. If possible, fix this prior to taking the next measurement.
Measuring individual items – the bucket test
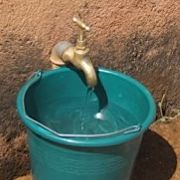 Although there are many ways to measure the flow of water, one of my own favourites (for indoor measurements) is also the quickest, simplest and cheapest. The bucket test.
For items (such as the shower) where the water disappears down a drain after a brief visit, simply :
- Turn it on as much as you would normally have it
- Catch the water in an empty bucket, for a known time (say, 1 minute)
- Measure or estimate the amount of water in the bucket
You can now work out how much water you use in a 5 minute shower (or however long it takes).
NB : This method can also be used to measure activities such as washing the car.
Measuring ‘filled’ items
 When it comes to measuring items which are filled prior to use (such as a bath, or the kitchen sink); just estimate the volume. To get an idea, treat the object (bath or sink) as being rectangular, and simply multiply length x width x height.
If you’re mathematically inclined, you know exactly how to refine this. Go crazy.
NB : The toilet actually gets included in this category. Although the water ends up in the slightly weird shape of the bowl, it starts out in that rectangular box overhead. Take the lid off, see how much water’s in there, and measure it in the same way as the bath.
Measuring Whitegoods
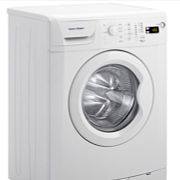 This is where things get a little tricky. The easiest way (by far) is just to have a look in the manual, which will usually tell you exactly how much water is used per load. If it just tells you the flow rate, multiply this by the amount of time it runs.
If the manual isn’t available, grab a few buckets and measure the water which leaves the machine; before it disappears down the drain.
Adding it all up
By now you’ve got a pretty good idea of how much water you use in a shower, a bath, washing the car and so on. To get an idea of how much you use on an ongoing basis, however, keep a diary.
This doesn’t need to be a lifelong thing by any means – a week should do just fine. For 7 days, keep track of the number of loads of washing you do, showers you have etc. At the end of the week it will be a simple matter to work out the amount of water you use.
As a check – grab a couple of recent water bills and work out the amount you use per week. Alternately, note down the meter reading at the start and end of the 7 days. The totals should be reasonably similar.
Final thoughts
Naturally, the purpose of measuring your household water use is to help keep things in check. It can be a great way to see wasteful areas, or those which are in need of a little fine-tuning.
Next week I’ll be taking a look at a great way to squeeze a little more out of the water you already have – installing a rainwater tank.
These activities can make a great project for the kids. If you’d like to teach your young ones the value of water conservation in a simple and fun way, leave a comment below or send me an email. There are a lot of great resources available for precisely this.
Comments are closed.